
Photos & folders
At a glance
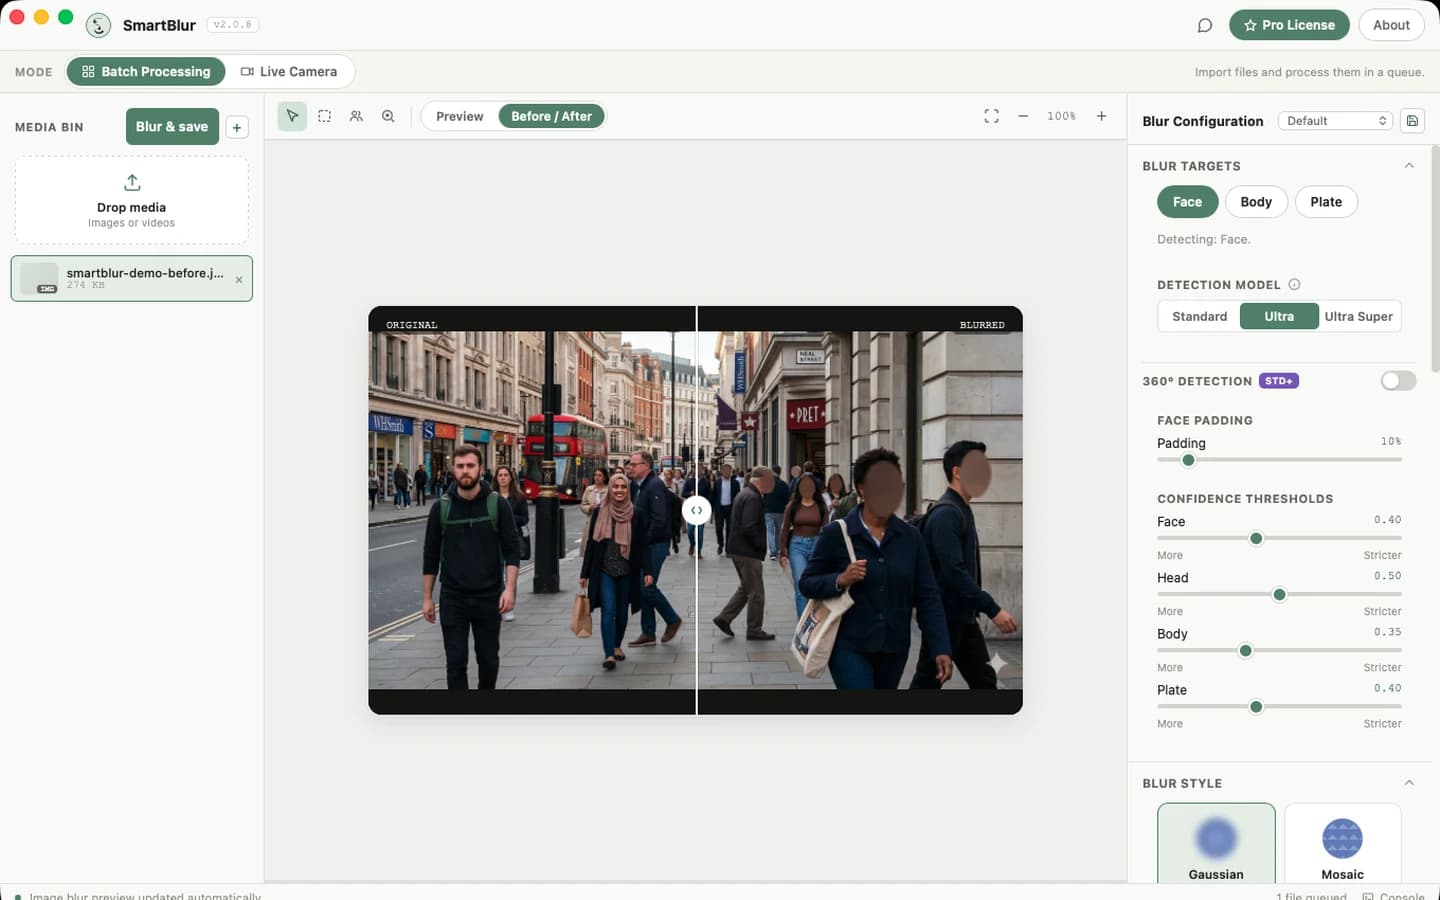
Prepare a single image or a folder of photos for sharing. Automatic targets and fixed manual regions can be used together.
Step by step
- 01
Add the photo or folder to the media queue and select an image. Keep your original folder separate from the export destination.
- 02
Enable face or body coverage. Pro also detects plates. Choose Gaussian blur, mosaic, a solid shape, or an overlay.
- 03
On Standard, select individual detected faces in the current photo. Use Pro reference matching when person rules need to apply across files.
- 04
Review each image, including the background. Export new copies and inspect the saved files, not just the preview.
Before you share
A batch is not a single privacy decision. Different frames may need different coverage, especially when people enter or leave the scene.
Full desktop guide (English)
Blur Photos
Single-photo workflow
- In Batch Processing, add a JPG or PNG with Drop media, +, or drag-and-drop.
- SmartBlur selects the image and automatically creates a processed preview.
- Choose Face and/or Body. Pro also provides Plate detection. Review the result because detection is probabilistic.
- Use AI Detection to correct misses or false positives.
- Add a fixed rectangle or ellipse for an extra manual region; it stays at those image/clip coordinates and does not track motion. Standard can assign per-person decisions in one image at a time, while Pro adds face/body identity matching across image, video, batch, and live workflows.
- Compare Preview and Before & After.
- Configure Output and click Process to save the final file.
Every detection/blur setting change schedules another preview for the selected still image. Wait for the updated-preview status before judging the change.
Multiple photos
- Add all images to the Media Bin.
- Select and inspect representative images: bright/dark, near/far, crowded/sparse, and edge cases.
- Apply a built-in or custom preset.
- Set a separate output folder and a clear suffix such as
_blurred. - Click Process. The button becomes Cancel while a job is active.
- Review completed output—not just the preview of the first item.
Common photo decisions
| Scene | Recommended first test |
|---|---|
| Portraits | Default, Face, Standard |
| Group photo | On Standard or Pro, test Face/Ultra and a slightly lower Face confidence |
| Street/crowd | On Pro, test Street Footage/Ultra Super and review Body and Plate false positives |
| Office/CCTV still | Office CCTV preset |
| Rotated phone photo | On Standard or Pro, test 360° Detection |
| Face covered by mask/helmet or turned away | Add Body; on Standard or Pro, try Ultra |
Manual and selective review
- Draw Blur Region adds a fixed rectangle or ellipse where automatic detection is unsuitable. It does not follow a person or object between video frames.
- On Standard, Review people supports manual face decisions for one image at a time; it does not perform identity matching.
- On Pro, Selective Blur can match face or body identity across images, videos, batches, and live processing. Matching is probabilistic, so verify every result.
- A manual region should be treated as part of the job’s settings; verify its fixed coordinates in final output.
- License plates cannot be assigned a keep-visible person rule.
Before sharing
- Inspect faces at the image edges and in mirrors/screens.
- Confirm blur strength prevents recognition at full size.
- Strip metadata if EXIF location/device details are unnecessary.
- Keep source and output clearly separated.
- Open the saved file after processing to confirm it is valid and complete.