Blur Your First Photo
Expected result
If you add a photo, SmartBlur places it in the Media Bin, automatically creates a processed preview, and reports Auto-processed filename. Changing detection or blur controls automatically refreshes the selected image preview. The original file remains unchanged.
Steps
- Open SmartBlur and stay in Batch Processing.
- Click Drop media or +, then select a JPG or PNG. You can also drag the file into the Media Bin.
- Wait for the processed preview and status confirmation.
- Start with Face. Add Body or Plate only when the scene requires them.
- Use Preview to inspect the result and Before & After to compare it with the source.
- If something is missed, lower its confidence slightly or change Standard → Ultra. Use Ultra Super only when the extra accuracy is worth slower processing.
- Increase Face Padding if the blur does not cover enough area around a detected face.
- Choose Gaussian, Mosaic, Solid Shape, or Overlay Image and adjust Intensity.
- Set the Output options, then click Process.
- Open the saved result and review it before sharing.
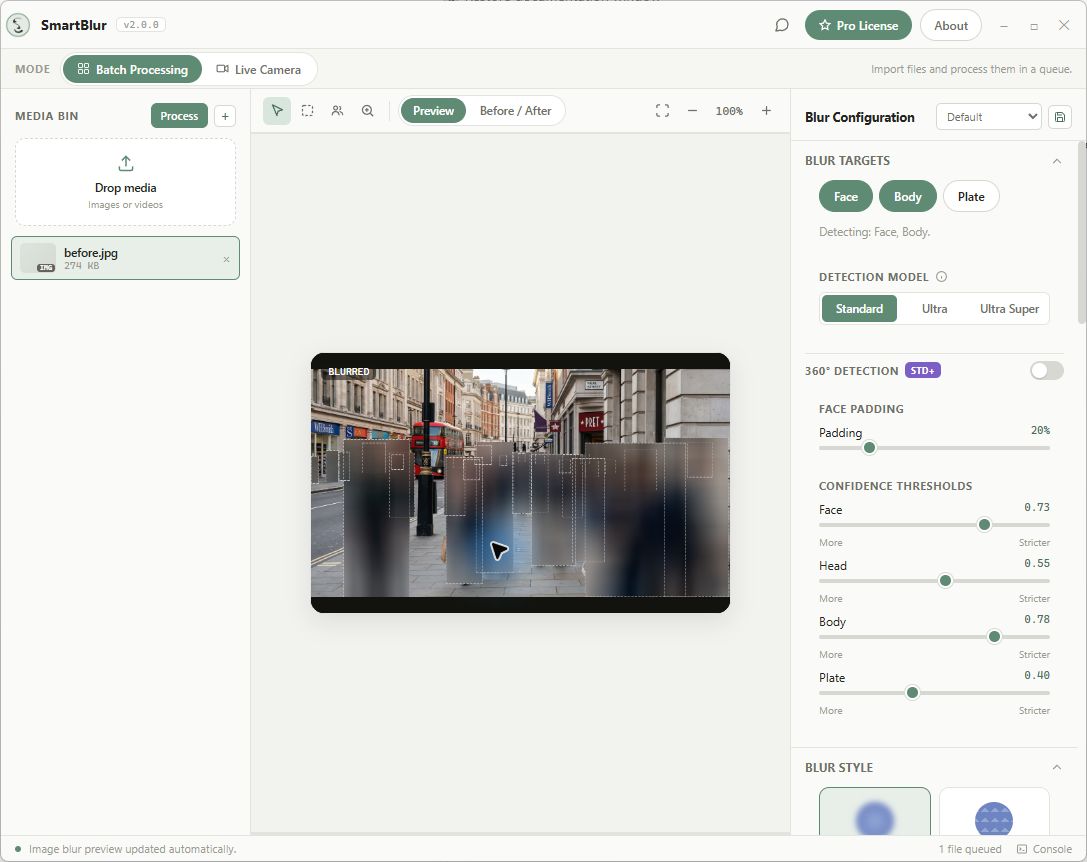
Real SmartBlur v2 photo preview with the active model, targets, padding, and confidence settings visible
Lower confidence means more detections and potentially more false positives. Higher confidence is stricter and may miss small, angled, dark, or obstructed subjects.
Good starting decisions
| Situation | Start with |
|---|---|
| Clear portrait or a few large faces | Default preset, Standard model |
| Office/security camera | Office CCTV preset, then review |
| Street, crowd, cars, distant subjects | Street Footage preset |
| Missed small or angled subjects | Lower the relevant threshold by 0.05; then try Ultra |
| Too many false positives | Raise only the affected target threshold by 0.05 |
| Blur box is too tight | Increase padding; do not rely on intensity alone |
Next: read the Desktop Workspace, AI Detection, or Webcam & RTSP guide.